Git: How to Write Commits and Why
Author: Federico Guerinoni
Prerequisites
Starting from zero git is an open-source software born to keep track of changes. What changes? All changes, theoretically you can track what you want as a human-readable format, source code, grocery list changes or whatever. Spoiler: it also tracks changes of binary files like executable files, office files, or other strange formats but this is not the focus of this article.
What is a commit? It is a “registration” of changes, you can see it like a snapshot of your files at a specific moment of the history. When you commit something the system tracks the author, timestamp and a message. Now I will summarize some general best practices to adopt when you write a commit.
- every commit should have a single responsibility for a single change
- limit subject to 50 chars
- wrap body to 72 chars
- use imperative mood in subject
- capitalize subject
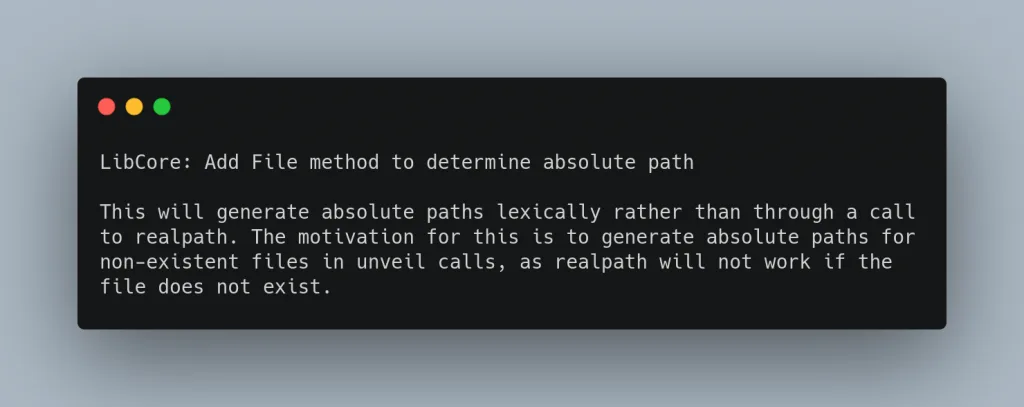
In the following image, you can see a simple example of a good commit message.

Git flow
After the first introduction part we can analyse the flow of Git. This is an important step to keep in mind when you write a commit or when you should choose the commit strategy and rules for your project.
A flow in git is how the code will be integrated and developed by all team members. There are many different kinds of flow and I will encourage you to search online all patterns in order to find the best that fits your needs, but here I will focus only on the difference that every pattern has on your commit message.
If you are familiar with git you know there is one branch that is considered “the default” and the reference for what feature there is in a software, this branch can be called “master” or “main” or “mainline”. Based on the strategy that you follow there are many different ways to interact with this default branch. These flows that you can adopt are something theoretically, are the rules that you establish for your project and with your team, there isn’t a real standard and the tools that you use can help to follow this pattern or can be only an interface for git.
Example 1: master branch, every team member starts from master and creates a branch for a specific thing and after a review will be merged into master branch. Every <n> commits you can choose to do a release using a tag on a commit of master.
Example 2: master branch for production, develop branch for keeping and merging all things that every member wants to merge. In this case, after many tests or beta releases the develop branch will be merged into master branch for a release.
Example 3: master branch for production, the team creates a feature branch with a big feature and every member that works on that feature starts from there and creates another branch for every sub-feature that will be merged on the “main” feature branch. When this big feature is finished all will be merged into the master branch.
Example 4: master branch, every team member sends a single commit to master that includes something stable and that does not break other things. In this case, every commit maybe will be a bit bigger and it is reviewed without a PR (pull request)
With these examples, I hope I have given you a little overview of how you can organize your workflow for your project. Then how can this affect how I should write a commit? Let’s see…
Git merge vs rebase and merge
This is another rule to add in your team, because this aspect is the core of how you should write a commit.
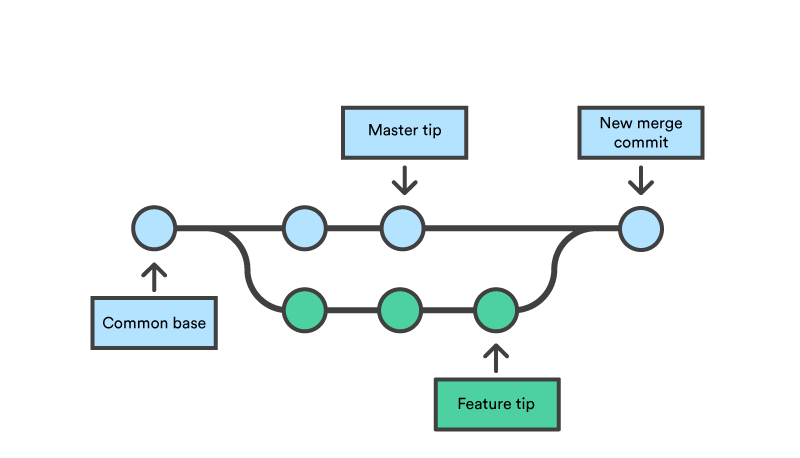
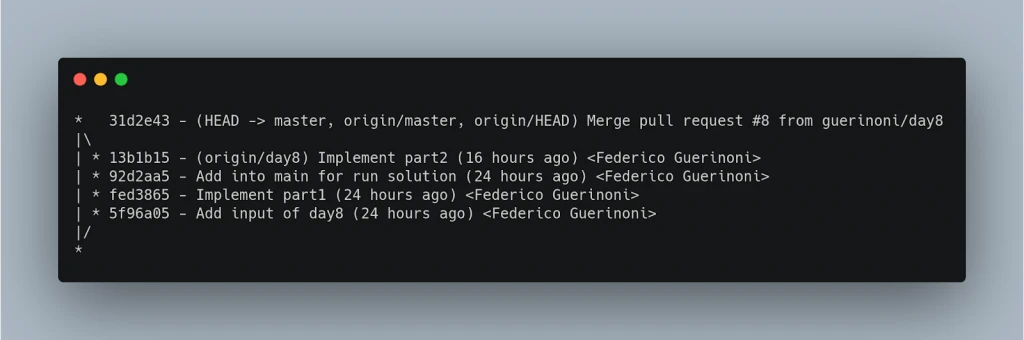
In the above example you can see how a separated branch will be merged into the default, in this case default is master. With this strategy you can see from log (and graph) which commits are part of the master branch and which are part of that feature, this allows you to write a commit message with less details because the context of the domain is already covered by that branch merged. In the following example you can see that the number of commits is less accurate because they are part of branch “day8” that holds the domain context of this feature. This is not meant as an incitement to write a bad commit but in this case you can avoid more details.
The following image shows how the history will be after a rebase and merge strategy, you can achieve this linear history also with merge fast-forward but I will not go deep in this difference.

Here all commits of the separated branch for that feature are after the latest commit of the master, then when you go to the history you can see something like this one.
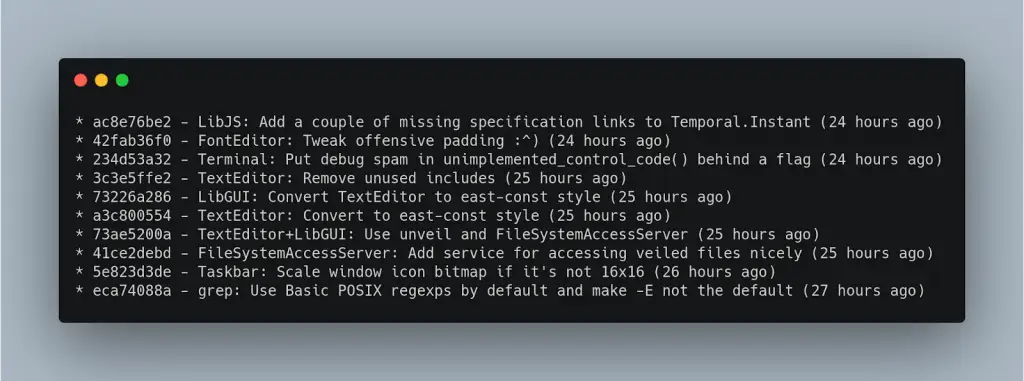
In this case, you can’t separate one feature from another because the history is linear, here you must write a perfect commit message because you should give a context of the changes and a little explanation in the body of the commit. Using this type of workflow means every commit represents also a sort of documentation for other people who will read code in the future and explore the history.
Code review
Another step during development is called code review. This process consists in submitting a request to other team members to review your changes for a specific feature. I will not be focusing on how to do a code review but usually, other people want to check:
- new code works as expected for that feature
- rest of code/feature not broken
- style of code
- performance issues
- documentation
Maybe you can check many other things but these five are the very minimum requirements for accepting a feature in the default branch. Then how do you review the code? There are mainly two options, all changes together or commit by commit.
Obviously every developer can use the method they think is better but if there are many line changes I will suggest you to follow step by step every commit, because every commit should have only one responsibility and you can see the subject and body for that commit for a better understanding.
I want to highlight how important it is to write a good commit with single changes for this phase because other developers can save a lot of time with a good work on git history. You can also deduce how important it is to do a little PR with few changes because the effort of reviewing other’s code is huge.
Hook
Git hooks live under the .git folder of your repo in a directory called hooks. The path to the hooks will look similar to repo/.git/hooks. They are custom scripts that git executes before or after events such as commit, push, and are a built-in feature there is no need to download anything.
Examples of hooks usages:
- Check commits for errors before they are pushed
- Ensure code meets project standards
- Notify team members about changes
- Push code into a production environment, and more
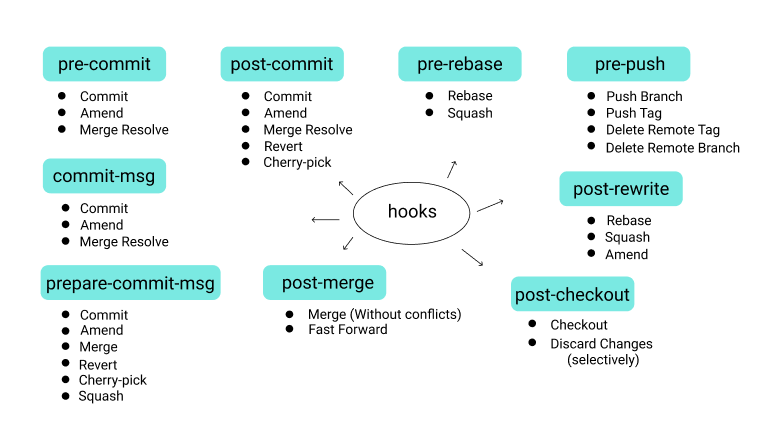
There are two different types of hooks, client and server-side. As you can imagine this design matches different purposes of check or notification. In the following images a complete map of types of hooks.
Ok now I will show a simple example of hook for pre-commit written in bash, this script will check your commit message (commit-msg) and will warn if your body doesn’t match with the rules, in this case must contain one of these keywords “Add: |Created: |Fix: |Update: |Rework:”.
#!/bin/bash

Color_Off='\033[0m'
BRed="\033[1;31m"         # Red
BGreen="\033[1;32m"       # Green
BYellow="\033[1;33m"      # Yellow
BBlue="\033[1;34m"        # Blue

MSG_FILE=$1
FILE_CONTENT="$(cat $MSG_FILE)"
# Initialize constants here
export REGEX='(Add: |Created: |Fix: |Update: |Rework: )'
export ERROR_MSG="Commit message format must match regex \"${REGEX}\""
if [[ $FILE_CONTENT =~ $REGEX ]]; then
 printf "${BGreen}Good commit!${Color_Off}"
else
  printf "${BRed}Bad commit ${BBlue}\"$FILE_CONTENT\"\n"
 printf "${BYellow}$ERROR_MSG\n"
 printf "commit-msg hook failed (add --no-verify to bypass)\n"

 exit 1
fi
exit 0
This is a very important integrated tool that helps you to keep your code and history consistent because you can also run other scripts on your code base for formatting code and other checks.
Many git hosting services like GitHub, Gerrit, GitLab can offer their tool to introduce some server-side commit hook for notification or other operations like running tests or deploy.
Conventions and use cases
Here I want to show some general conventions used in different kinds of repositories, you could choose from this list of tips your specific preferences based on your needs.
Conventional commits (https://www.conventionalcommits.org/en/v1.0.0/)
This is a set of rules followed for example by the Angular project that describes how you should write a commit in every situation. Here the template is:
- <type>[optional scope]: description
- optional body
- optional footer
This covers many standard situations like feature, bugfix, revert a commit or release a version with a specific tag.
Here is an example of a commit:

Bonus: https://github.com/carloscuesta/gitmoji-cli this is a very nice tool that helps you to commit from your terminal with some template already built-in.
Qt Project
Now let’s look at Qt source code rules, here you can find a detailed description on how to contribute to their repository and there is a page about commit policy (https://wiki.qt.io/Commit_Policy) that talks about rules to create a branch, with its name, and how to write a commit in Qt. Here all commit follow:
- a template (https://code.qt.io/cgit/qt/qt5.git/tree/.commit-template) this prepare every commit message with the structure specified in the file
- subject: title
- description in body
- a script that automatically generates a change-id, this needs a init setup with perl
- and their footers are mostly filled by gerrit with “Reviewed-by”, that keeps track of reviewers of that commit merged into master.
Qt uses gerrit as a tool to manage repository and code review and this model follows the example4 of “Git flow” chapter, then every commit contains a single change and will be reviewed atomically. (there is a method that allows linking many commits to each other but is not the common case that you find here).
SerenityOS
This is an open source operating system hosted on Github, its git flow model is based on sending a PR that implements or fixes a single thing but is allowed to send more than one commit. This is because for that feature you can also improve another part of the project and that part should stay in a dedicated commit.
Here there is a solo rule: subject + title and details in the body, usually the subject is also the scope of the project and it is easy to find what to write into commit.
I strongly encourage you to set up the pre-commit hook because the project already provides scripts that check your code. (https://github.com/SerenityOS/serenity/blob/master/.pre-commit-config.yaml)
This is because the merge strategy used for every PR is to merge with fast forward, similar to rebase and merge, then the result will be a perfect linear and clean history. Very cool to look inside every change.
Example of commit in serenityOs:
Linux Kernel
In the Linux kernel every commit will be sent using mail services of git, then you need to choose the right mail based on the subject (part of the kernel) that you changed. There is also a script that provides for you the current maintainer of that part of the kernel, this for cc-ing your patch. Since the review and submitting takes place only using mail you need to describe your patch very well because the history is linear and you must provide a good commit also for future people that look at that code (and the history).
In this repository you must commit your code with sign-off (git commit -s), it is used to say that you certify that you have created the patch in question, or that you certify that to the best of your knowledge, it was created under an appropriate open-source license, or that it has been provided to you by someone else under those terms. This can help establish a chain of people who take responsibility for the copyright status of the code in question, to help ensure that copyrighted code not released under an appropriate free software (open source) license is not included in the kernel.
There are also many rules about other footers like “Reported-by:, Tested-by:, Reviewed-by:, Suggested-by: and Fixes” or “Acked-by:, Cc:, and Co-Developed-by”, very nice footer in order to keep track of everything only based on repository.
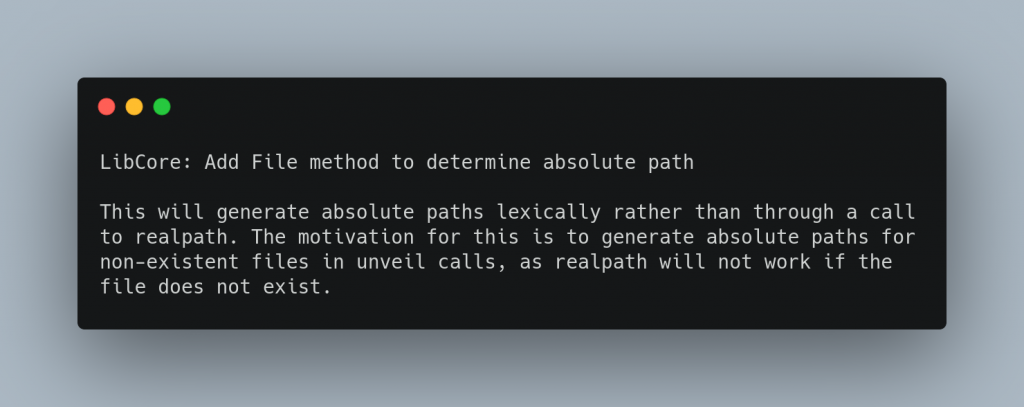
In the following image, there is an example of a commit in Linux kernel, very well documented and useful to read.
Go (Golang)
Also, the programming language by Google uses gerrit tool for code-review and follows the same model of Linux, single commit, single change will be merged without submitting a PR.
Here you will find the guide to contributing to the language, before starting contributing you will set up a tool called git-codereview, used to check your commit in the HEAD position of the current branch. The commit should follow these rules:
- The first line of the change description is conventionally a short one-line summary of the change, prefixed by the primary affected package
- A rule of thumb is that it should be written so as to complete the sentence “This change modifies Go to _____.” That means it does not start with a capital letter, is not a complete sentence, and actually summarizes the result of the change.
- Reference the issues if you are fixing a know issues
There are also other rules about review and commenting but I prefer to skip this part because it is not the core topic.
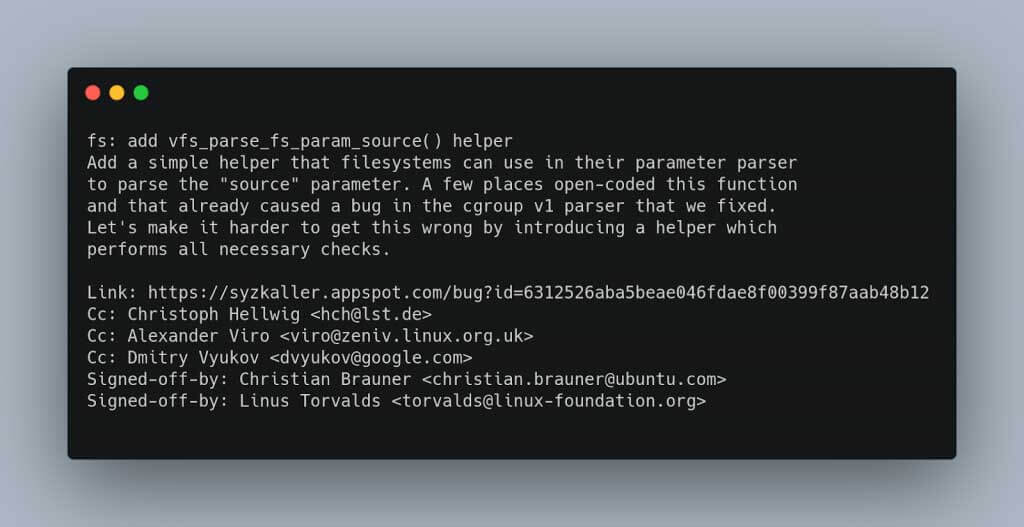
In the following image an example of commit in Go repository:
Conclusion
As you can see there are many aspects to consider before choosing a set of rules for git, flow, commit, hook and tools. Tools are likely to change frequently, the ones I use more often at the time of writing are:
- GitHub as a git hosting services
- GitHub Action for continuous integration
- git alias | Atlassian git tutorial
- Keep the knowledge as much as possible into the the git commit or code because they doesn’t depend on your extra tools or features of git hosting
In non popular/big repositories it is very difficult to see this rule, maybe because there is no need to dig into the history or maybe the tool covers a part of the benefits presented here.
Now you have all the information for choosing your strategy for your team and project, I leave you with some suggestions:
- If your project is an open-source project, long support and maybe more contributors the best way is to keep history super clean with little PR or using gerrit for merging one commit at time.
- If you are working on a project that requires features that impact a big quantity of code and merging makes sense only at the end of entire work you could take feature-branch flow without a linear history while keeping track of merging commits.
- If the project is very large, I suggest splitting your work into many different commits because a single merge may introduce changes within a part of the project which is not the main focus of the PR in question.
All of these tips work well for any size of team, also if you are working alone, because you can see the quality of the project also from the commit log 🙂